
Configure LDAP Server on CentOS 6
Configure LDAP Server on CentOS 6

LDAP is an acronym for Lightweight Directory Access Protocol. LDAP is used as a more secure option to NIS. And is the Linux equivalent to Active Directory. OpenLDAP is solid as a rock, and rarely has issues once setup properly, and is an ideal Cross-Platform Directory Server. HOWEVER, OpenLDAP has it’s limitations, i would HIGHLY suggest using 389 Directory Server
Original Reference: http://www.server-world.info/en/note?os=CentOS_6&p=ldap&f=1
the LDAP domain we are setting up will be: dc=mydomain,dc=com
Let’s Get Started! Login, and su to root

from here install the necessary tools/dependencies

from here tell ldap to start on startup, and start the service

now edit the following config file:

edit line 16 so that SLAPD_LDAPS=yes
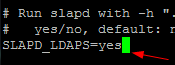
now edit the slapd.conf

add the following lines to the new blank file:

remove all the default clutter in /etc/openldap/slapd.d/*

now run a slaptest (to me that’s just funny…)

edit the following file:

edit to match this line exactly

now we need to edit the next config

copy/paste the following:
dn: olcDatabase={1}monitor
objectClass: olcDatabaseConfig
olcDatabase: {1}monitor
olcAccess: {1}to * by dn.exact=gidNumber=0+uidNumber=0,cn=peercred,cn=external,cn=auth manage by * break
olcAddContentAcl: FALSE
olcLastMod: TRUE
olcMaxDerefDepth: 15
olcReadOnly: FALSE
olcMonitoring: FALSE
structuralObjectClass: olcDatabaseConfig
creatorsName: cn=config
modifiersName: cn=config
From here set the permissions, and start LDAP

now onto the actual LDAP Domain Configuration. Start with Part1

now part 2

part 3

part 4

from here we need to generate our LDAP admin password:
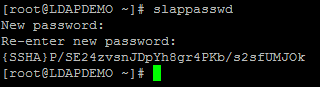
copy/paste this to a safe location, it will need to be used again
change directory

from here we need to create/edit the back-end database

copy/paste the following
dn: cn=module,cn=config
objectClass: olcModuleList
cn: module
olcModulepath: /usr/lib64/openldap
olcModuleload: back_hdb

dn: olcDatabase=hdb,cn=config
objectClass: olcDatabaseConfig
objectClass: olcHdbConfig
olcDatabase: {2}hdb
olcSuffix: dc=server,dc=world
olcDbDirectory: /var/lib/ldap
olcRootDN: cn=admin,dc=server,dc=world
olcRootPW: {SSHA}xxxxxxxxxxxxxxxxxxxxxxxx
olcDbConfig: set_cachesize 0 2097152 0
olcDbConfig: set_lk_max_objects 1500
olcDbConfig: set_lk_max_locks 1500
olcDbConfig: set_lk_max_lockers 1500
olcDbIndex: objectClass eq
olcLastMod: TRUE
olcMonitoring: TRUE
olcDbCheckpoint: 512 30
olcAccess: to attrs=userPassword by dn="cn=admin,dc=server,dc=world" write by anonymous auth by self write by * none
olcAccess: to attrs=shadowLastChange by self write by * read
olcAccess: to dn.base="" by * read
olcAccess: to * by dn="cn=admin,dc=server,dc=world" write by * read
In here we need to edit our oclRootPW (enter the SSHA generated earlier), as well as change the dc=server,dc=world to dc=mydomain,dc=com, there is a total of 4 domain replacements in this file.
now add the info to the LDAP database
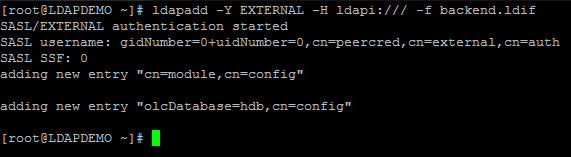
now we need to create/edit the frontend

please make sure to edit lines 6, and 7 to match the dc=server,dc=world
dn: dc=server,dc=world
objectClass: top
objectClass: dcObject
objectclass: organization
o: Server World
dc: Server

dn: cn=admin,dc=server,dc=world
objectClass: simpleSecurityObject
objectClass: organizationalRole
cn: admin
userPassword: {SSHA}xxxxxxxxxxxxxxxxxxxxxxxx

dn: ou=people,dc=server,dc=world
objectClass: organizationalUnit
ou: people

dn: ou=groups,dc=server,dc=world
objectClass: organizationalUnit
ou: groups
From here we need to again copy/paste the SSHA to replace the default config. We also need to replace dc=server,=dc=world with dc=mydomain,dc=com. There is a total of 4 replacements in this file as well.
now commit the frontend to the database
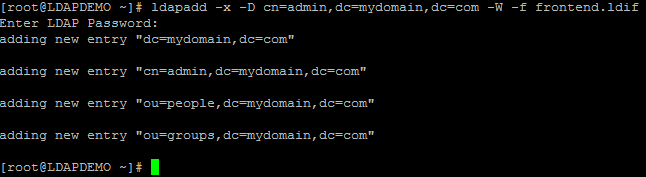
restart LDAP, and you are in business

from here if you use ldapadd/ldapmodify, you will need to click here
That’s it, you have successfully configured LDAP on CentOS.
- To configure phpLDAPadmin click here
- To configure LDAP Master/Slave Replication Click here
- To configure LDAP over TLS/SSL click here
- To Configure LDAP Logging click here
- To Authenticate Windows 7 Against LDAP click here
- To configure your LDAP server as an internal DNS server click here
- To configure your LDAP server as a DHCP server click here
- To configure your LDAP server as a NTP server click here
Hosted Linux Servers at www.zwiegnet.com/go
2 Comments