
Map Shared Drive in Group Policy
Map Network Shared Drive in Group Policy
This article walks you how to map a network drive with group policy to specific users/groups, or other custom specifications on windows server 2003, or 2008, SBS, standard, enterprise, or datacenter.
log into your domain controller, and open up group policy.
Browse to the organizational unit (OU) and create a new GPO Object, and Link here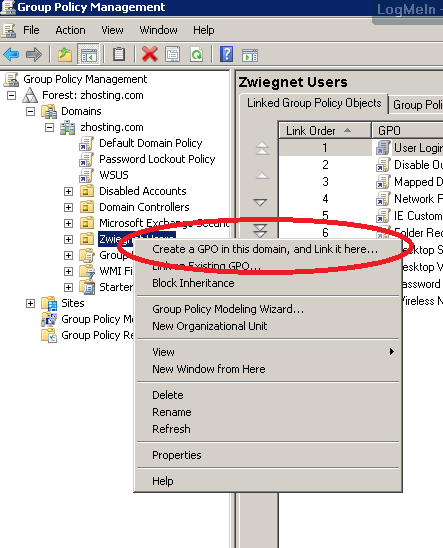
from there give it a necessary name such as “Network Drives”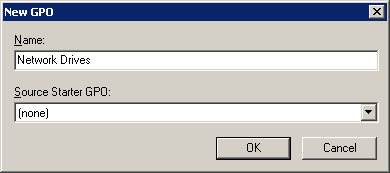
Hit ok, and then edit the group policy by right clicking on it, and selecting edit.
under user configuration, expand preferences, and then expand windows settings
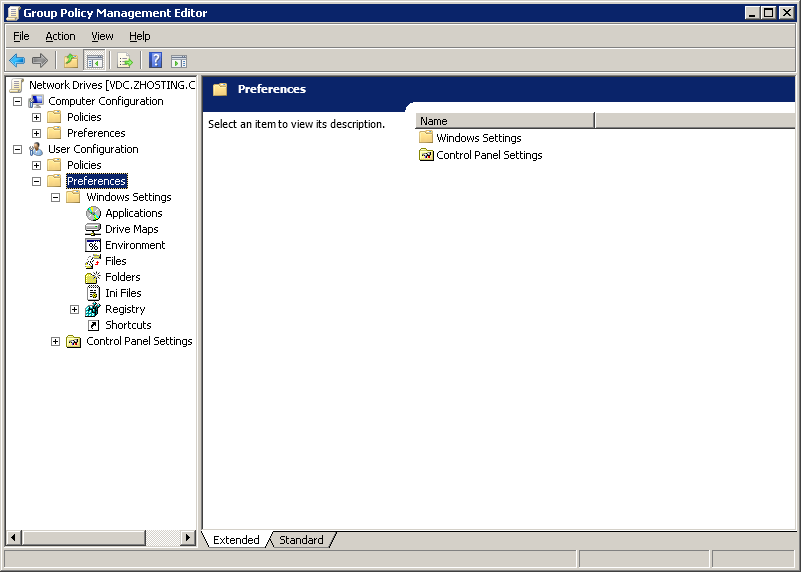
Select Drive Maps, right click, and scroll over “new” and select mapped/network drive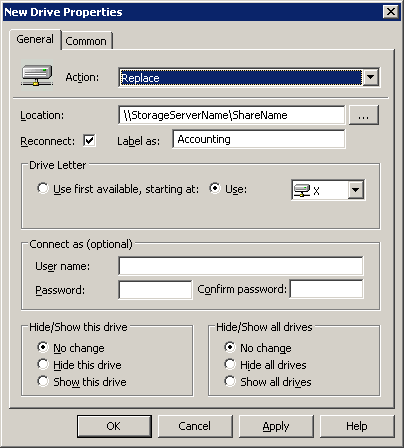
you want to make sure that you first select “replace” that way if you already have a local copy of that mapped drive, it will replace it instead of creating a duplicate, even if you are starting fresh, you can use replace.
From there type in the share’s UNC path, in this example it’s \StorageServerNameShareName
we want to make sure we hit “reconnect” otherwise it will only put it in there once, and after that it will not try to reconnect.
If you want to give it a custom name such as “accounting” add what you want to the “label as” field, otherwise it will show up as the share path for the name.
Select the letter drive you want (keep in mind that the further away from C:/, or D:/ the better, for example if you set it for E:/ when someone plugs a flash drive in, it will not work, so use higher letters if you have the choice.
from there, there is another tab that is called “common” select that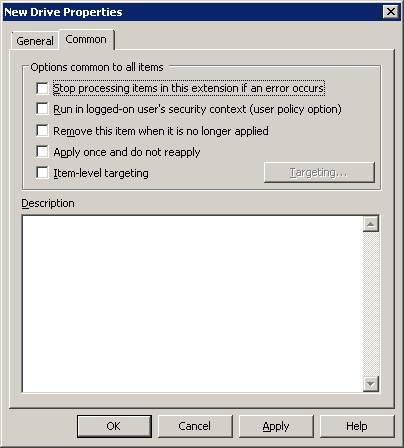
there are other options that may apply to your organization, but the one we are foccusing on is “item level targeting” this will let us specify what users/groups/or other custom factor the share will be applied to. Select Item level targeting, and click on targeting
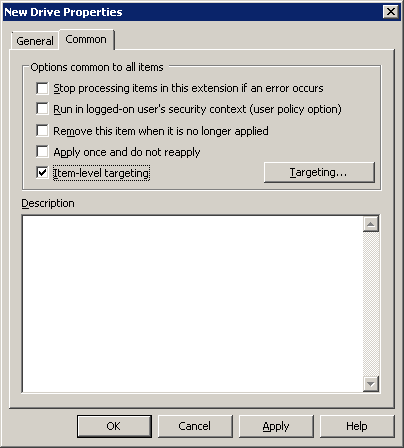
you will see the following area, looks confusing, but hit “new item”
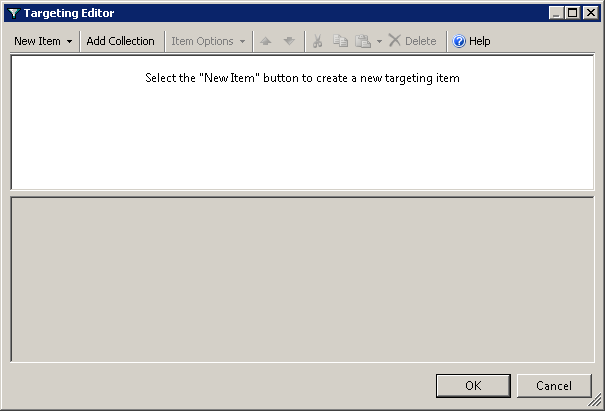
as you can see you have a lot of options as to the way you can narrow, and specify this group policy/share for specific conditions.
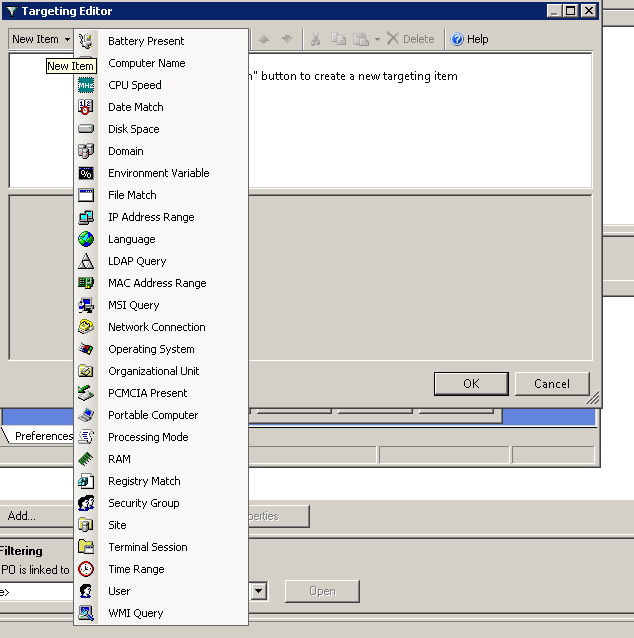
we are going to hit “security group”
hit the browse button (…) from there you can pick the security group from active directory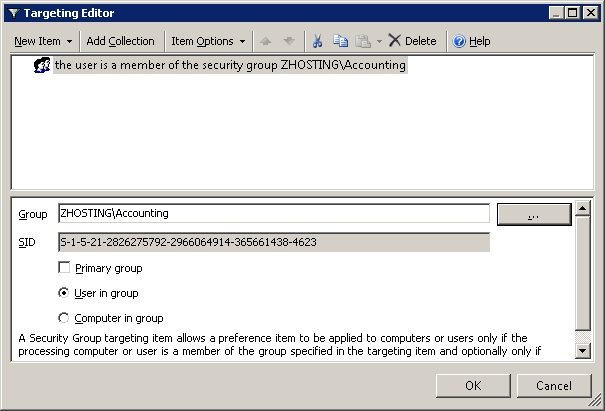
as you can see we have selected accounting, but there’s one more thing you should be aware of, when you add MULTIPLE security groups/conditions, the default is a stickler, let’s add that one “exception user” to the mix that needs access to this share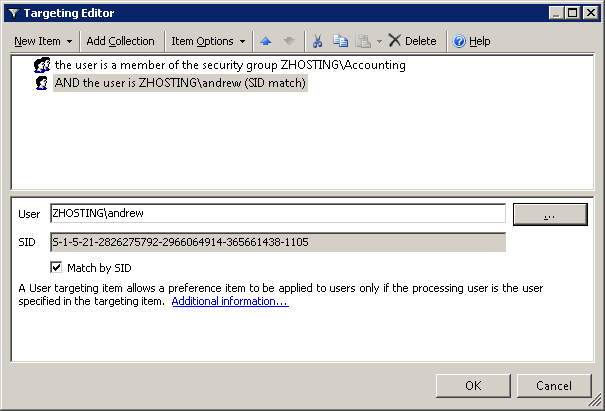
as you can see, it gives the option of “and” so both conditions would have to be true for this to work, that’s generally not the case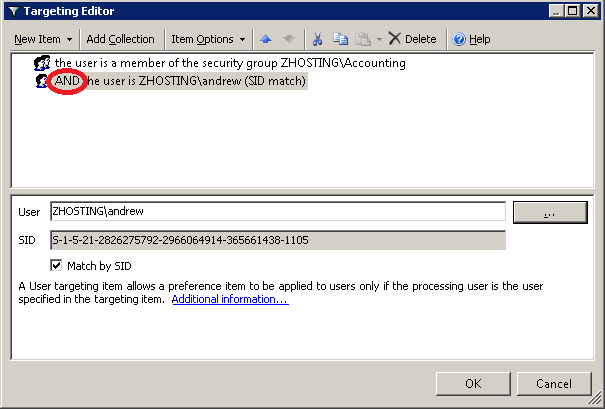
go to “item options” and select “or”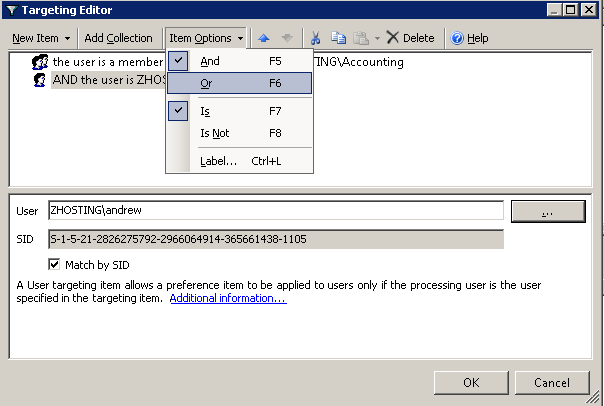
now the group policy is as it should be. This works for any computer With NT Framework 4 or higher (windows 7, and Vista by default)
But…. Windows XP is still widely used in Corporate America, if your computer is not fully up to date with the latest windows updates, a great troubleshooting step to try if the drives do not map is do download and install Group Policy Preferences installer from Microsoft, and deploy to all machines, it’s available at the above link.
http://www.microsoft.com/en-us/download/details.aspx?id=3628
Once this is installed, reboot, and you should be good to go. (Keep in mind that a mapped drive with group policy requires a full reboot of the host computer, and then logging in, because this is targeted to user-side groups, you need to restart.
That’s it! You can now Map network Drives with Group Policy!
Related guides: Map a network Drive Windows | script to map a share to windows