
Migrating Exchange 2003 to Exchange 2010
This transition has been done many times by our organization for independent companies, and it’s time for us to share our secrets to success.
Let me first explain the example environment:
- 2003 Standard/Enterprise Domain Controller
- Exchange 2003 Enterprise Server
- Exchange 2010 Server
This post will walk you through the basics on how to migrate the physical data of Exchange 2003 to 2010 with as little pain as possible.
Things to be aware of up front:
When you migrate your mailbox from Exchange 2003 it takes it offline until it’s migrated, and since it will be migrated over Gigabit Ethernet, the smaller the mailbox, the better — anything over 5GB may even fail. It’s important to clean out any old mail before you start the process; it will make your life much easier!
*** MAKE A BACKUP OF ACTIVE DIRECTORY, AND EXCHANGE, IN CASE SOMETHING GOES WRONG! ***
Let’s talk about the Outside Outlook Anywhere/RPC, OWA aspect of this first, because we will be having to make an Exchange Topology Change. Normally DNS (such as mail.domain.com) is pointed to a firewall at your location, that then forwards to the Exchange server.
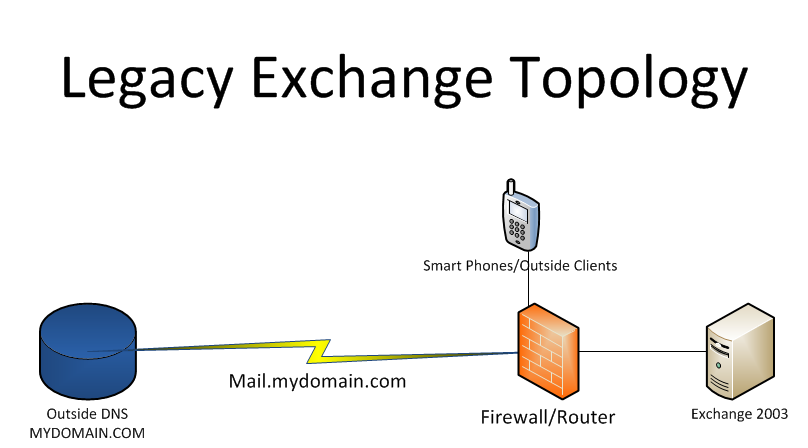
From there we are going to transition to a period of time called “coexistence,” when both Exchange servers are running, sending/receiving emails while the migration occurs. This requires adding a few outside DNS records on a separate WAN IP. You will be adding “autodiscover” and “legacy” — legacy will be port forwarded to your 2003 Exchange Server, and autodiscover and mail will then point to the 2010 server. Do not change this yet — this is just explaining what will occur when we get to the necessary point to make these changes.
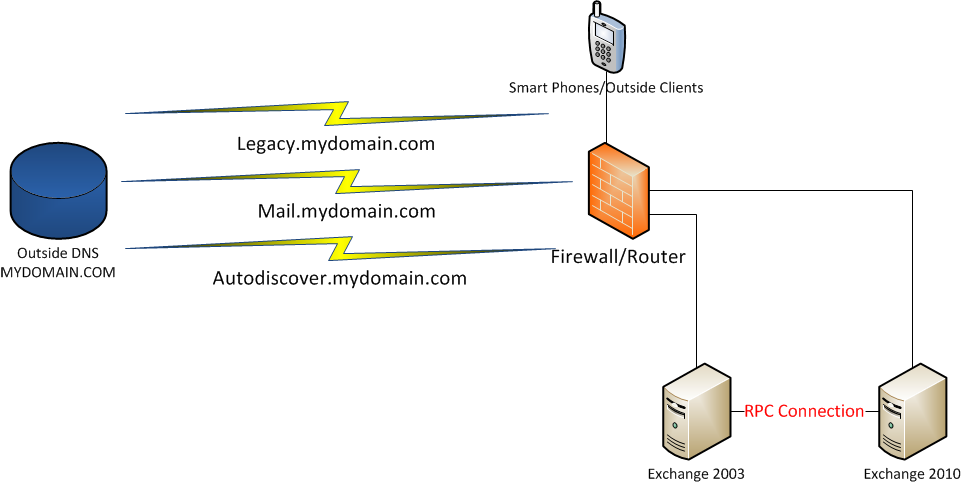
From there we will decommission Exchange 2003, and be left with only 2010.
Once our outside DNS records have been changed (thanks to our DNS host), mail.mydomain.com and legacy.mydomain.com point to Exchange 2003, and only autodiscover.mydomain.com points to the 2010 Exchange server.
Let’s Get Started
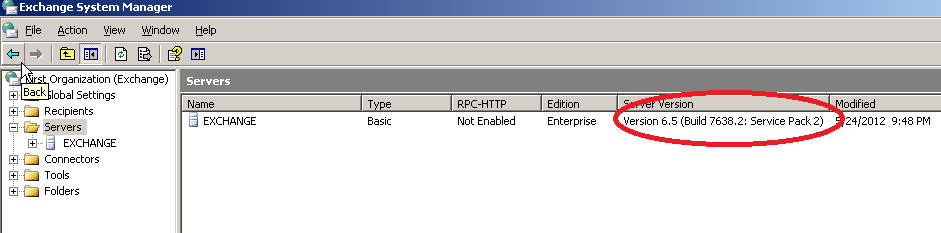
First, make sure that your Exchange 2003 server is running Service Pack 2. If not, apply it before you begin.
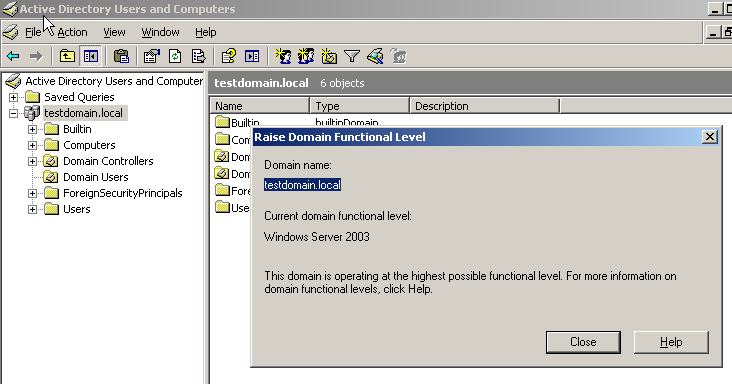
You also have to be sure that you are running domain Forest Functional level of 2003 or higher — if not, raise it to 2003 before you continue.
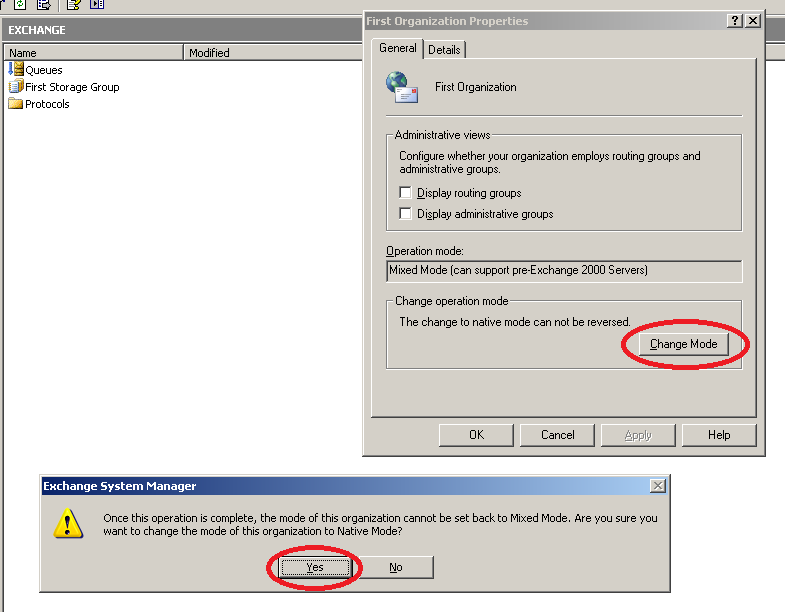
From here we will put our Exchange 2003 server in “native mode.” Change to native mode by right-clicking on the First Organization, going to Properties, and following the change-mode process.
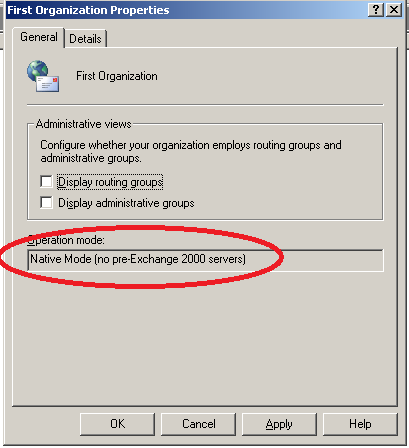
As you can see below, the mode changed.
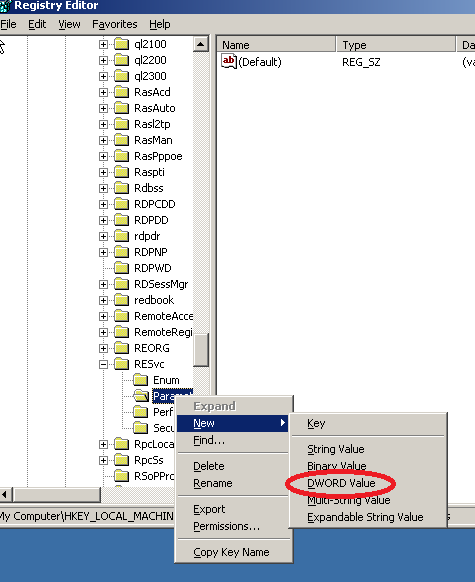
Now we have to make one change in the registry on our Exchange 2003 server. Go to:
HKEY_LOCAL_MACHINE\System\CurrentControlSet\Services\RESvc\Parameters
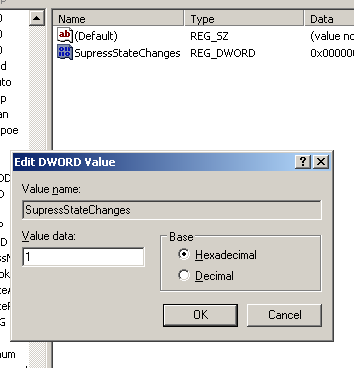
Right-click > New > DWORD Value > name it SuppressStateChanges > set its value to 1 > then either reboot or restart the Simple Mail Transfer Protocol (SMTP) service.
Set the value to 1.
From there, download the Exchange Pre-Deployment Analyzer from Microsoft’s download center and make sure all tests pass. If not, review the above steps.
On the freshly installed 2008 R2 machine where you’ll be installing Exchange 2010, go to Server Manager and add the necessary roles.
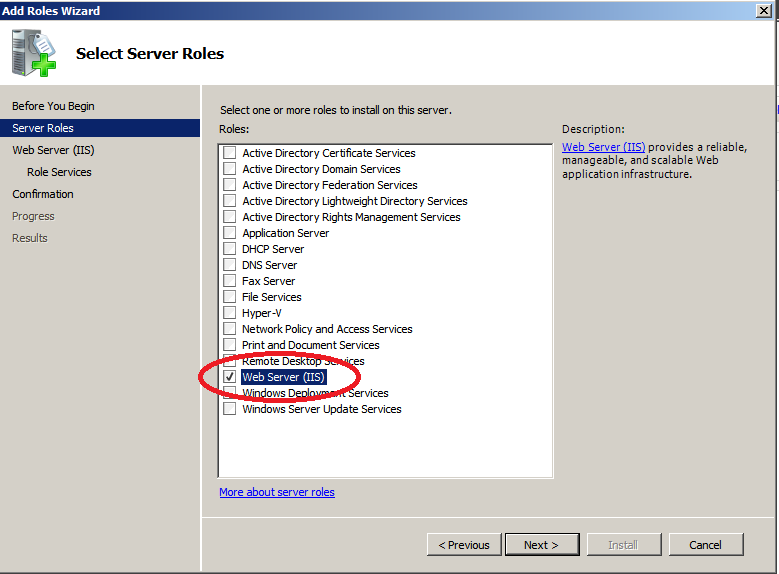
Select “Web Server (IIS).”
From there select Static Content, Default Document, Directory Browsing, and HTTP Errors.
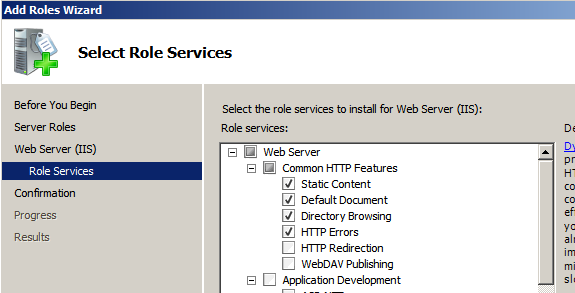
Also select all options under Performance and IIS6, then Next → Install.
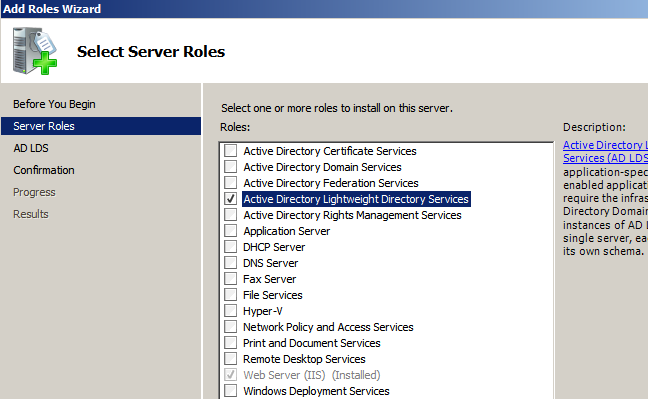
After that there is one more role that needs to be added: AD LDS Services.
Install (reboot if asked).
Once installed, go into Windows Features and select “Add New Features.”
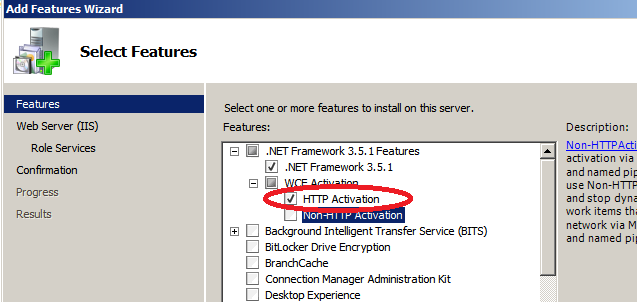
Add HTTP Activation (make sure .NET Framework 3.5.1 is checked).
Also make sure RPC over HTTP is checked.
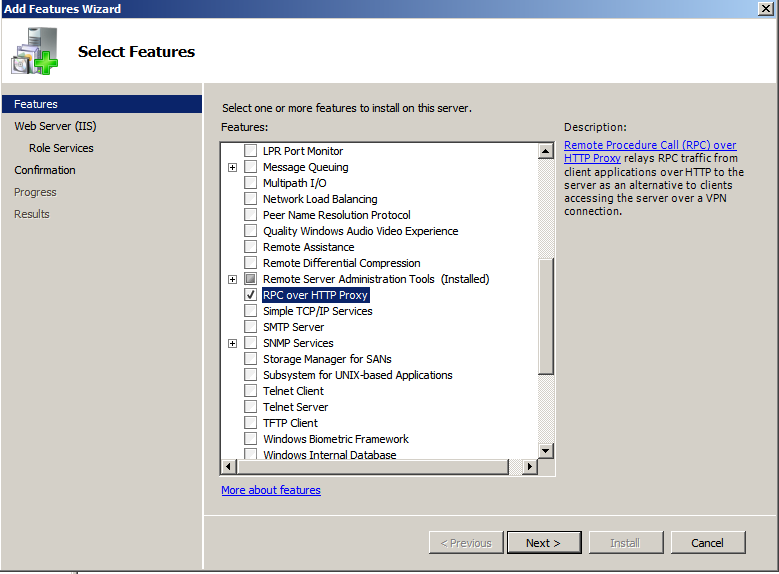
(You may be required to reboot in between.) From here, open Services and make sure the Net.Tcp service is set to Automatic and is started.
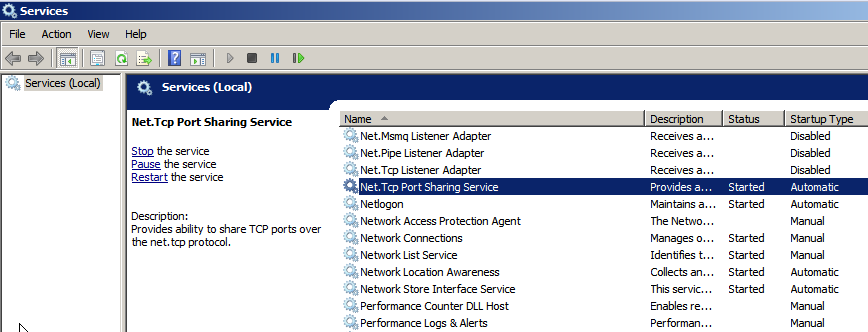
From here it’s time to open the Exchange 2010 installation media — open the setup file to start.
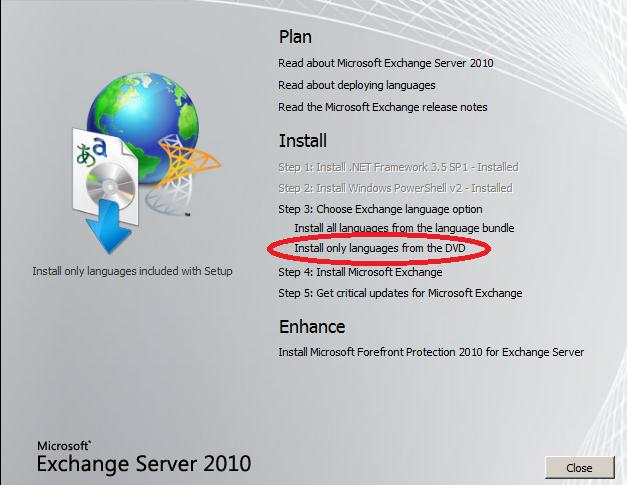
Install languages from the DVD (unless you have a reason to do otherwise).
Select “Install Microsoft Exchange” and follow the next few steps.
From here do the typical installation — note that below you can specify what hard drive you’d like to install Exchange on if you’d like to change it.
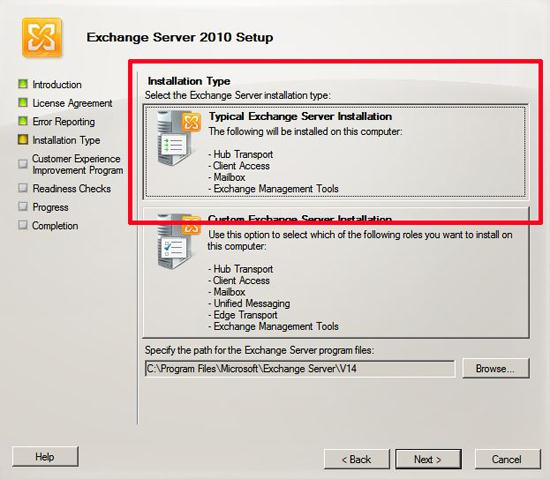
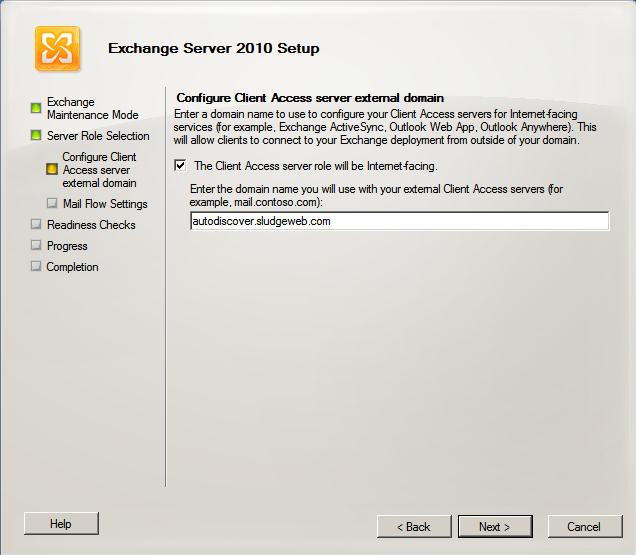
Here, put in the autodiscover name if you would like to have access from the outside on your mobile phone, iPad, other computer, or other Exchange servers.
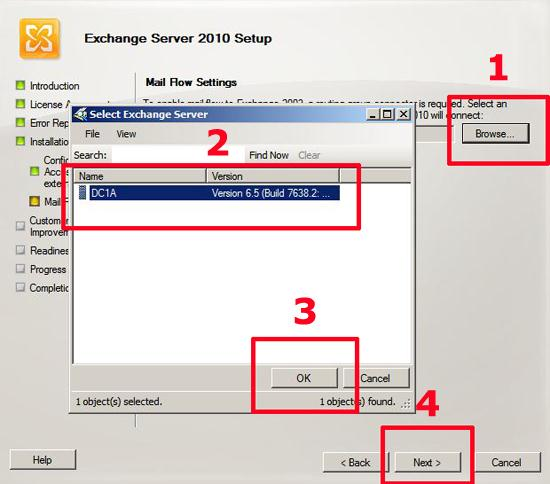
Select your 2003 Exchange server so that mail flow can be configured to work between the two servers and they can coexist:
- Hit Browse
- Select the Exchange server
- Hit OK
- Hit Next
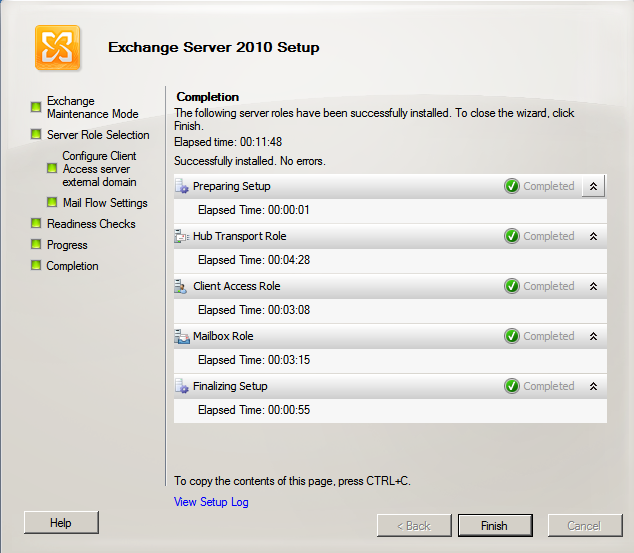
It will run some prerequisite checks. Hit Install afterward, and then take a break — this part takes forever.
Once complete, hit Finish, then reboot.
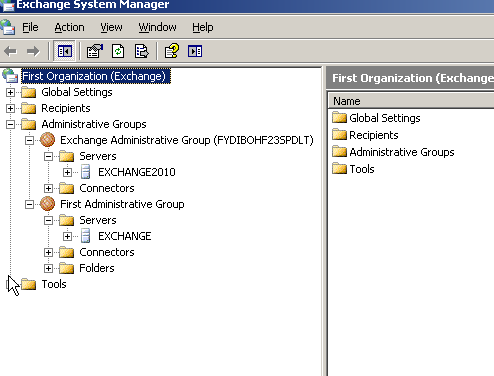
As you can see below, there is now another Exchange server detected in the console.
Starting the Data Migration
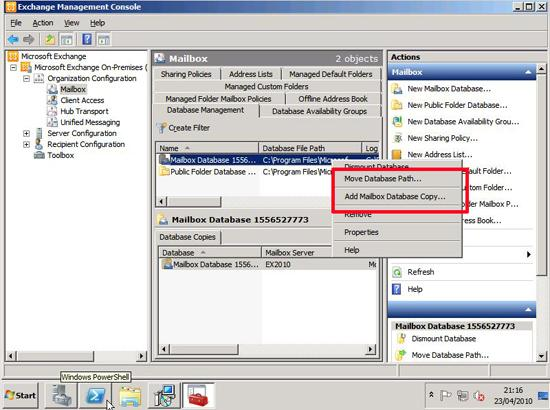
Go to Organization Configuration, and then Mailbox. Here we want to move the store by selecting “Move Database Path” so it’s on the new Exchange 2010 server.
Now check to make sure your old OWA/Exchange is working, just to be sure, before proceeding further.
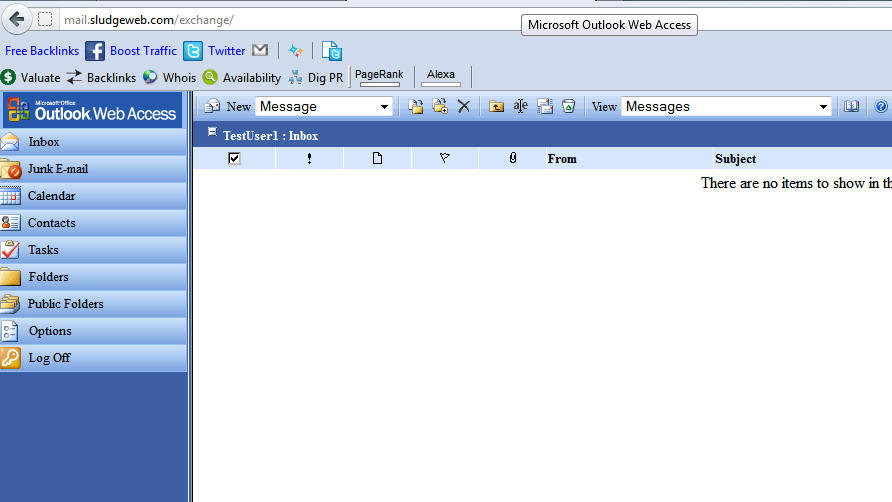
OK, we’re good.
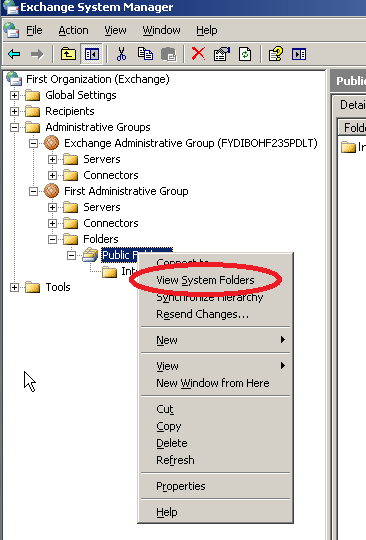
Go to the 2003 management console, your 2003 public folder, and then select “View System Folders.”
Expand FREE+BUSY Schedule, and go to the properties of the First Administrative Group.
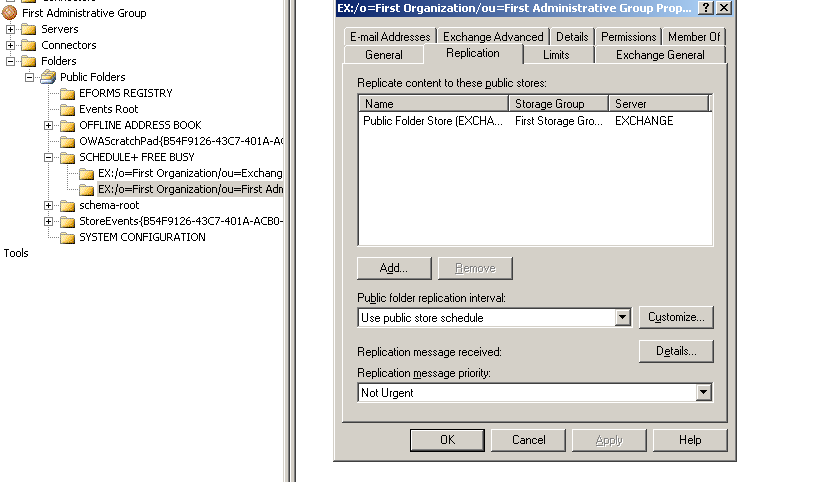
Select “Add” — it will show what your new public folder store will be.
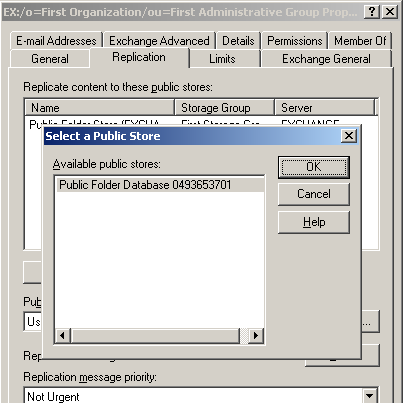
Go ahead and hit “OK,” then change the replication to Urgent and Always Run.
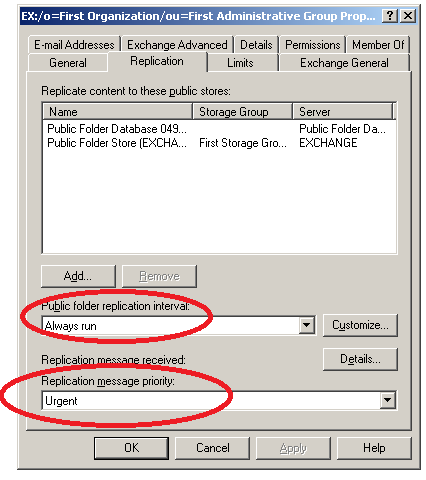
Go through all the public folders and repeat the process — add the replication partner, then set to Always Run and Urgent. This should take about 24 hours for everything to replicate; it just takes forever because public folders are prioritized very low in Exchange.
Now it’s time to start setting up Exchange 2010 with the Send/Receive Connectors.
Go into Server Configuration, then Hub Transport, and go to the properties of the Default Connector. We want to go to Permission Groups and allow anonymous users to send email to us (this enables receiving email).
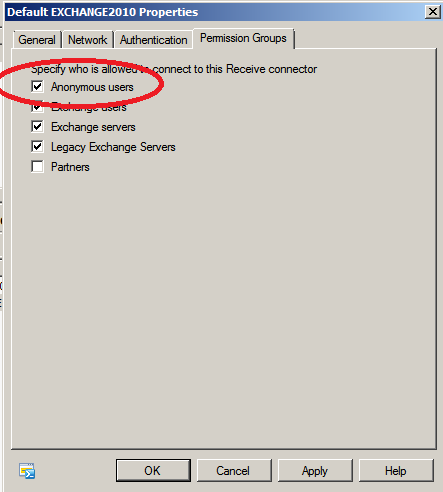
That’s it for that — easy.
Now let’s go to Organization Configuration and Hub Transport to create a Send Connector.
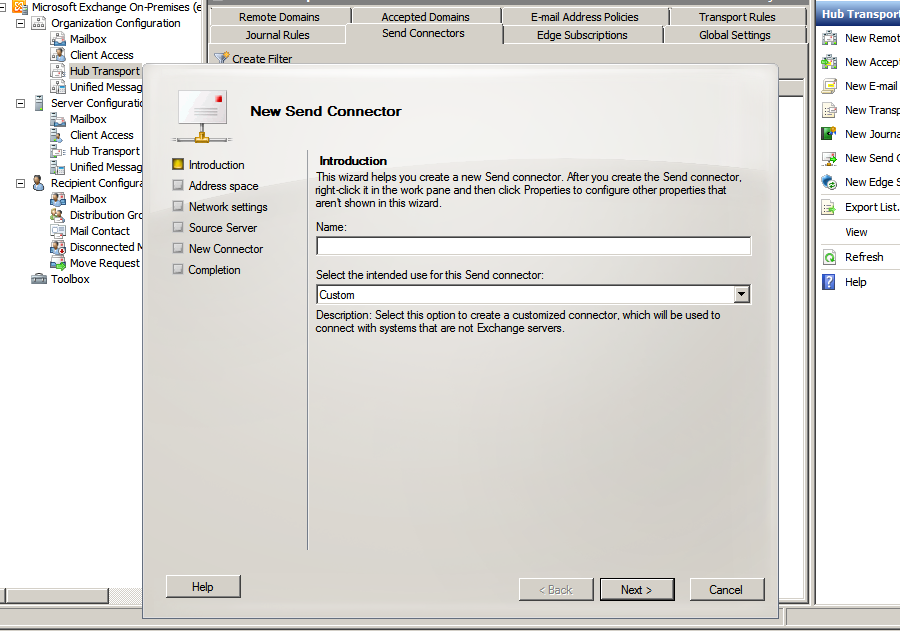
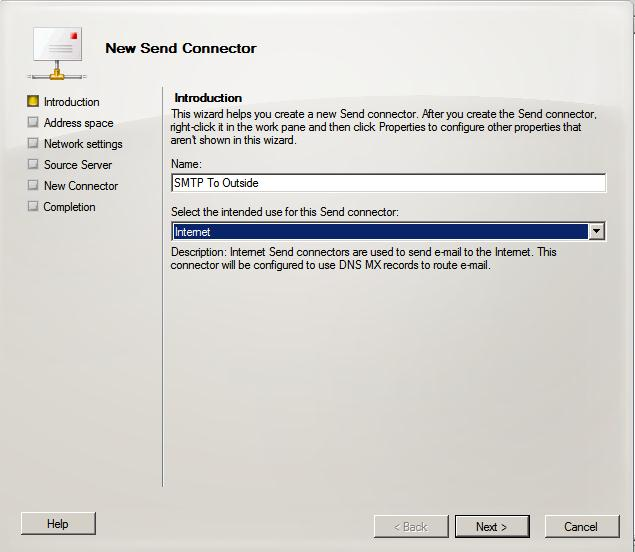
Insert a name — “SMTP To Outside” usually works well. Since we are sending email out to the internet, select Internet.
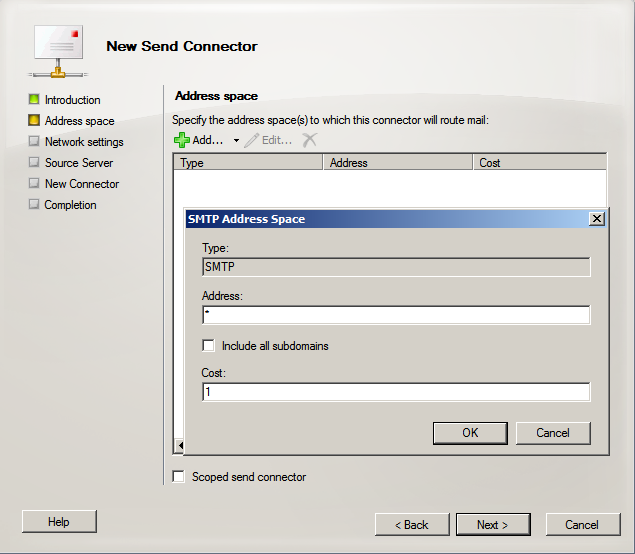
Add an address space, and put a * in the address, so that if the Exchange server’s IP ever changes it will still be able to send mail (this may be different if you have multiple IPs on the same server).
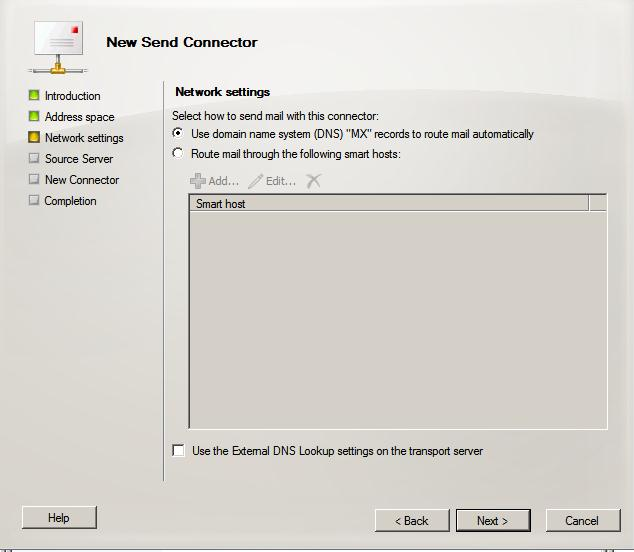
From here, this relies on DNS to send email properly (if you use a smart host like Postini, this may be slightly different).
Next.
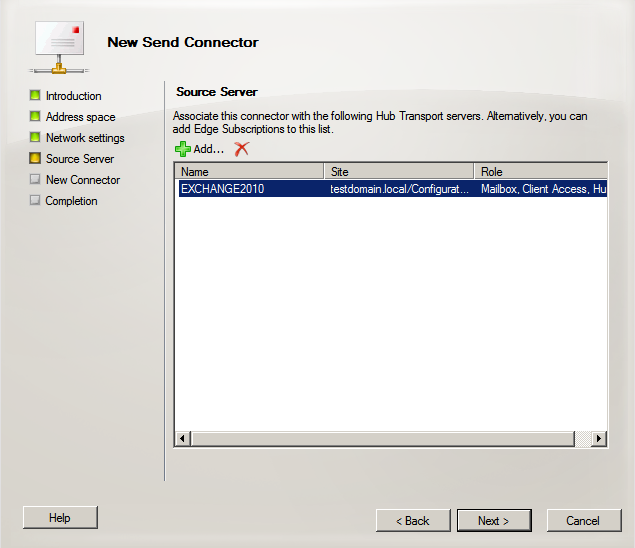
Next it will ask what server you want to send email with — since we only have one, we’ll use the default of itself.
Hit Next, then New.
It should complete successfully.
Hit Finish.
Let’s log into our new OWA to make sure everything’s working correctly by going to:
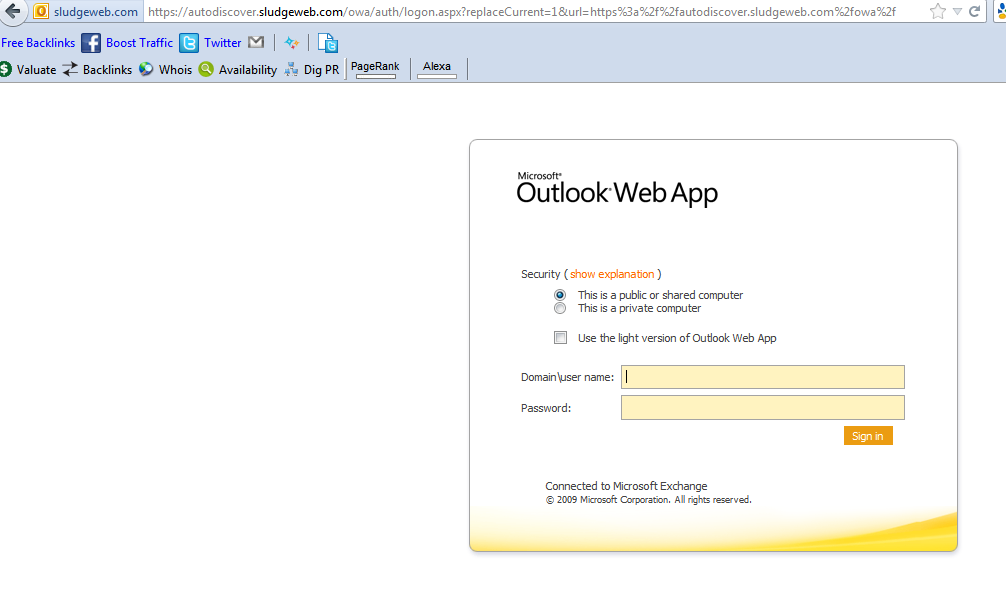
As you can see, here is our new OWA — so it’s time to switch out our DNS:
- Autodiscover points to the same place
- Legacy points to the same place
- Mail.mydomain.com switches to the new 2010 server
From here go to Recipient Configuration, and then Mailbox.
Below you can see there are a few mailboxes for this example — TestUser1 and TestUser2.
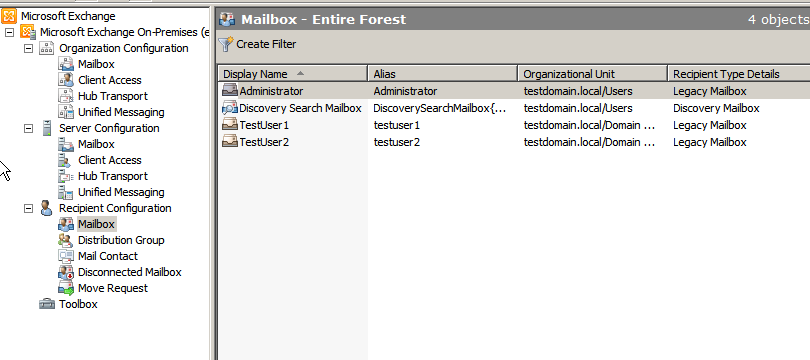
*** Disclaimer: once you proceed with this next step, the mailbox will be taken offline to migrate to Exchange 2010! *** Do this during off-business hours.
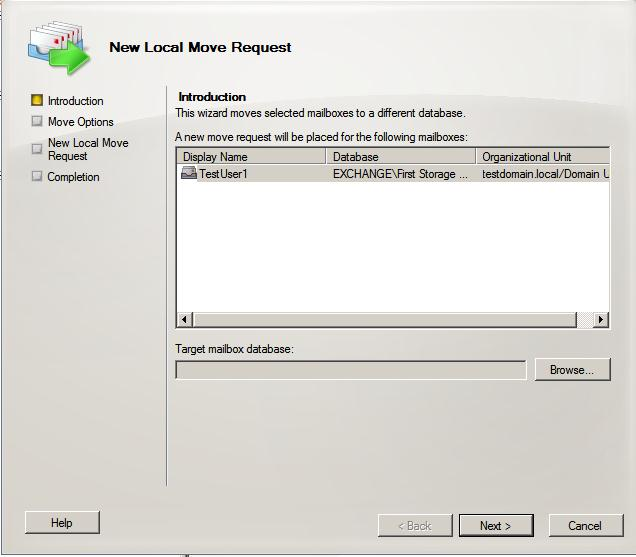
Right-click on the mailbox, and then select “New Local Move Request.” Select Browse, and select the new target mailbox database, then click Next.
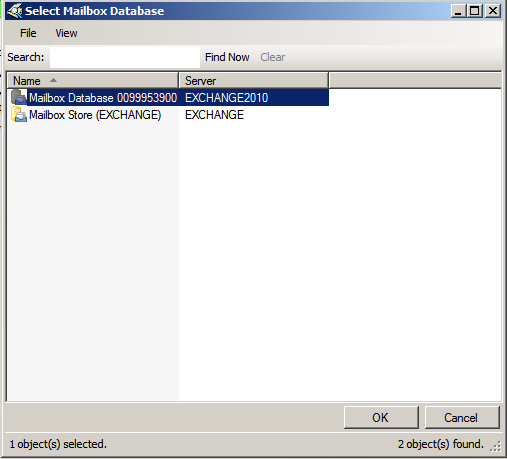
Select the name of our new Exchange server, and hit OK.
This is where having a smaller mailbox comes in handy — if there are any corrupted messages, they will be caught here. For this example we’re going to hit “Skip the mailbox,” but if you have a large mailbox, hit “Skip corrupted messages” and set the number to something generous like 500 — the reason is that if you get 3/4 of the way through and hit your threshold, you’ll have to spend hours retrying again.
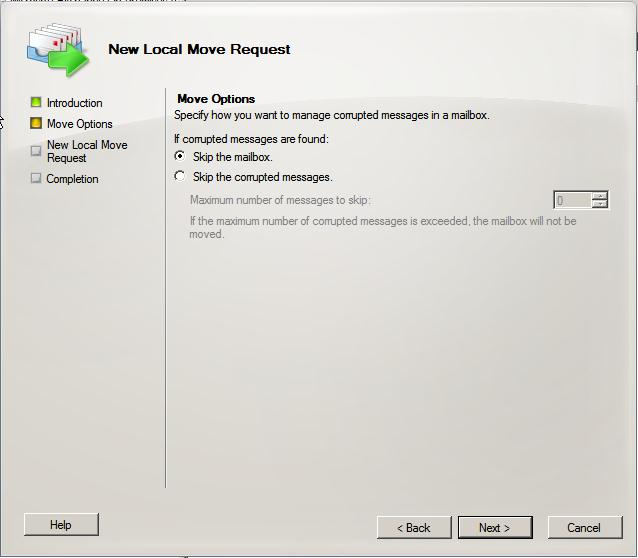
Hit Next. As soon as you hit “New,” the migration process begins.
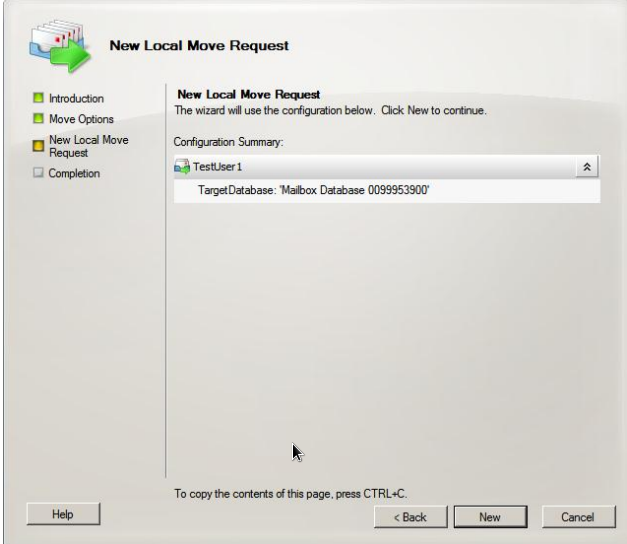
It should look like this when done — this user has been moved to the new Exchange server.
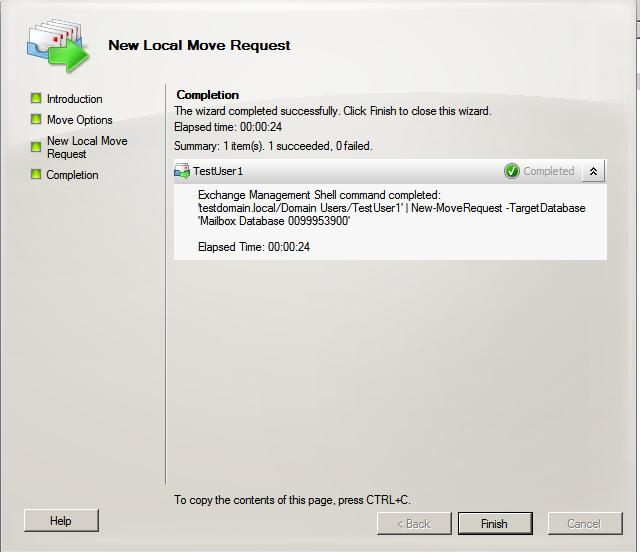
Test with Outlook Web Access to make sure you can send/receive email. If so, do this for groups of users at a time — you can select multiple and proceed.
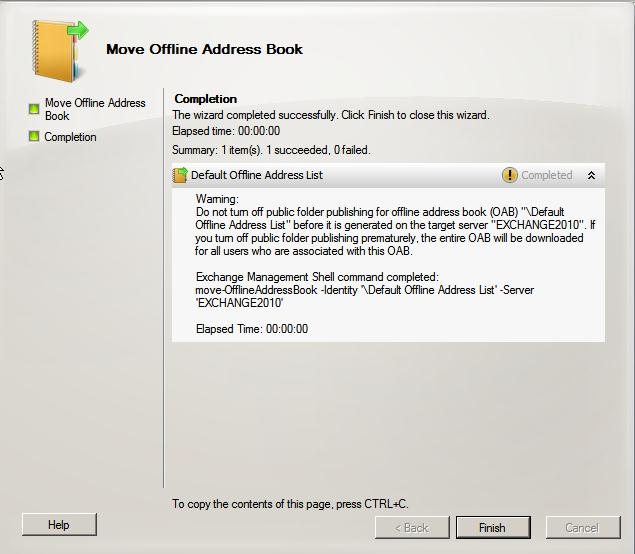
After that entire process is done, go back to Organization Configuration, Mailbox, and Offline Address Book. This is still on our old server, so we need to move it.
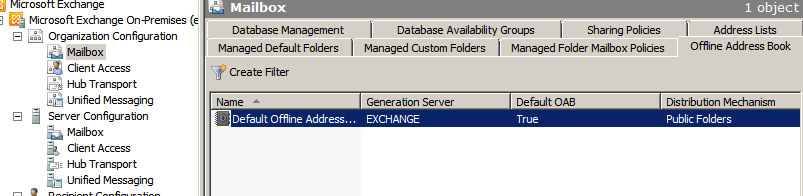
Right-click, go to Move, and select the new 2010 server. Once completed, verify that it’s 2010 that now holds the address book.
Setting Up the Email Address Policy
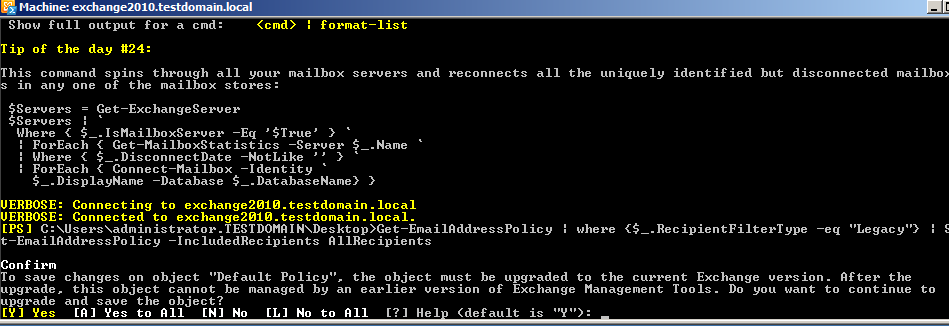
Let’s set this up by going to the Exchange Management Shell. Run the following command:
Get-EmailAddressPolicy | where {$_.RecipientFilterType –eq "Legacy"} | Set-EmailAddressPolicy –IncludedRecipients AllRecipientsHit “a” to confirm Yes to All.
From here there are a few more things we need to update — run the following commands:
Set-AddressList "All Users" –IncludedRecipients MailboxUsers

Set-AddressList "All Groups" –IncludedRecipients Mailgroups

Set-AddressList "All Contacts" –IncludedRecipients MailContacts

Set-AddressList "Public Folders" -RecipientFilter { RecipientType -eq 'PublicFolder' }

Set-GlobalAddressList "Default Global Address List" -RecipientFilter {(Alias -ne $null -and (ObjectClass -eq 'user' -or ObjectClass -eq 'contact' -or ObjectClass -eq 'msExchSystemMailbox' -or ObjectClass -eq 'msExchDynamicDistributionList' -or ObjectClass -eq 'group' -or ObjectClass -eq 'publicFolder'))}
Sweet — now that all those are done, things are looking a little brighter.
Decommissioning Exchange 2003
Go through each replication item and check the “Replication” tab to make sure they all say “In Sync.”
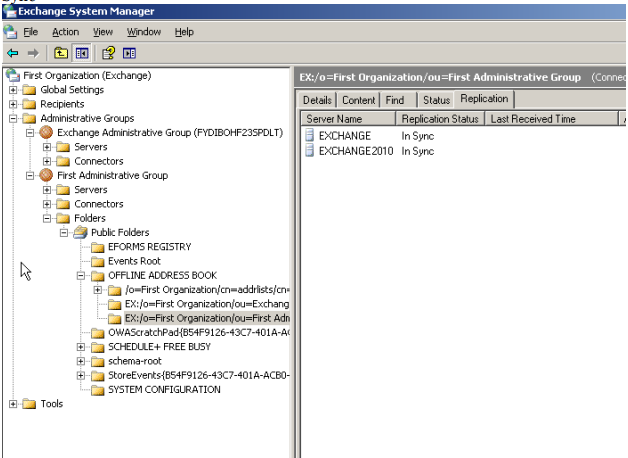
From there, right-click each folder and go to Properties again, one by one, and remove 2003 from the mix.
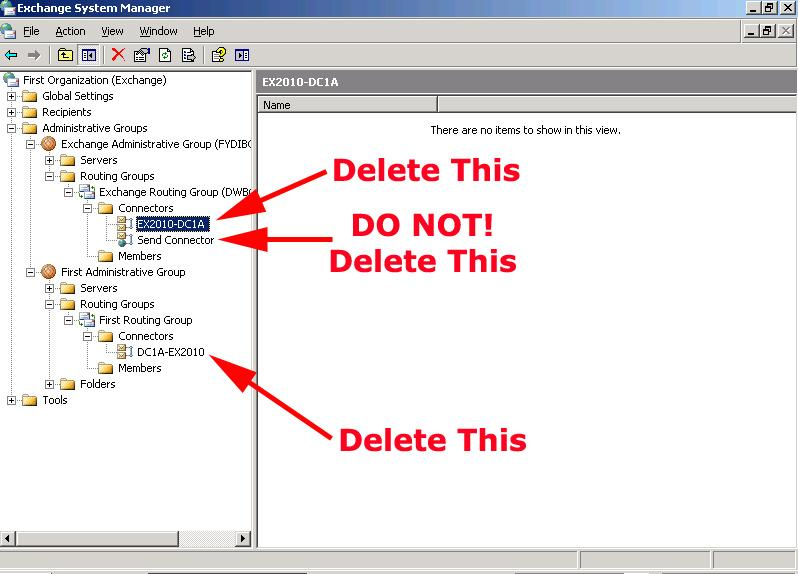
Remove the SMTP connectors from Exchange 2003 and for 2010. Make sure you leave your Send Connector for Exchange 2010, however — just remove the one with two envelopes on it.
From there go to Recipients and Recipient Update Services. Even though Exchange 2010 doesn’t use this, you still have to tell Exchange where to go with it in order to decommission 2003. Change these to your 2010 server.
With Exchange 2010 (post SP1) this may not work!
So that you can gracefully remove Exchange 2003, the Recipient Update Services needs to be removed first. If you cannot gracefully remove it (as above), you’ll need to manually remove it from Active Directory. To do this, run ADSIEdit.msc (on Server 2003 you will need the support tools installed first). Then navigate to:
Configuration > CN=Configuration,CN={domain} > CN=Services > CN=Microsoft Exchange > CN={Exchange organization name} > CN=Address Lists Container > CN=Recipient Update Services
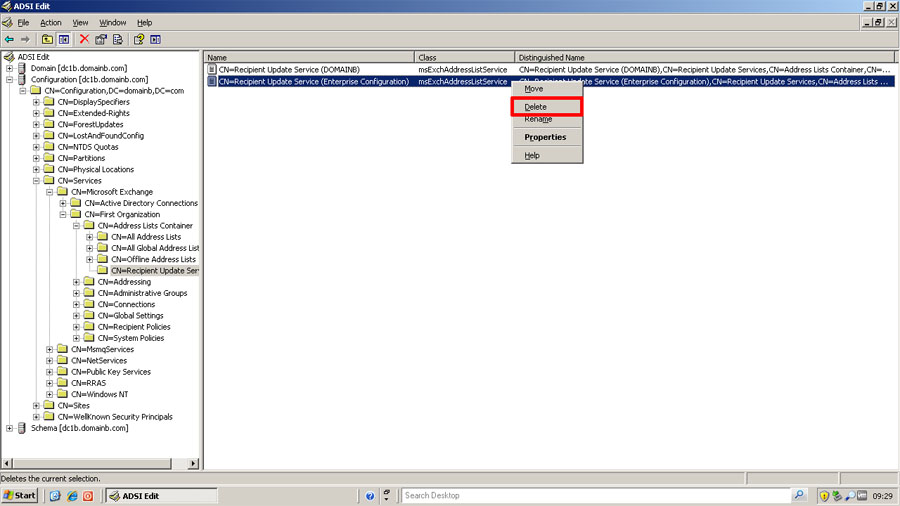
Make sure EVERYTHING is out of your Exchange databases, and dismount the store.
When you are certain all is good to go, browse to your Mailbox Store in Exchange Management of 2003, right-click, and hit “Dismount.”
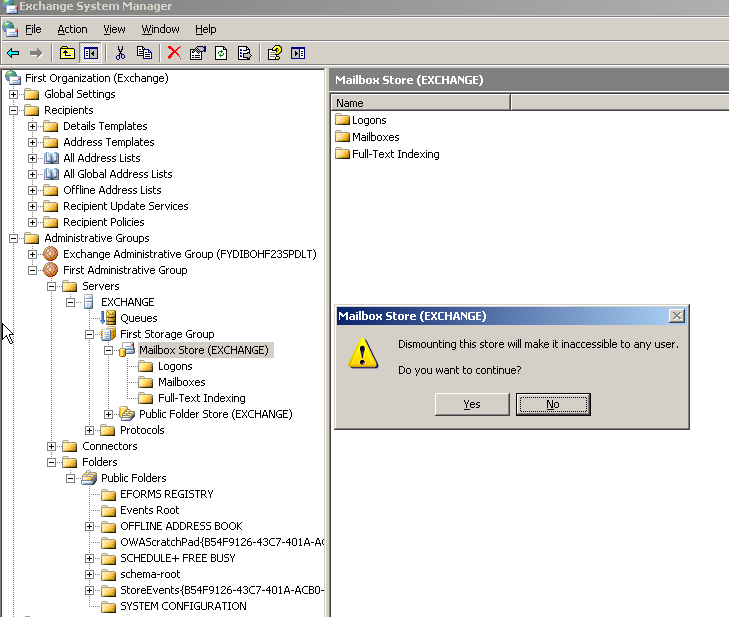
It will ask if you’re sure — go ahead and hit Yes.
Stop all Microsoft Exchange related services.
From here, we can go ahead and uninstall Exchange 2003.
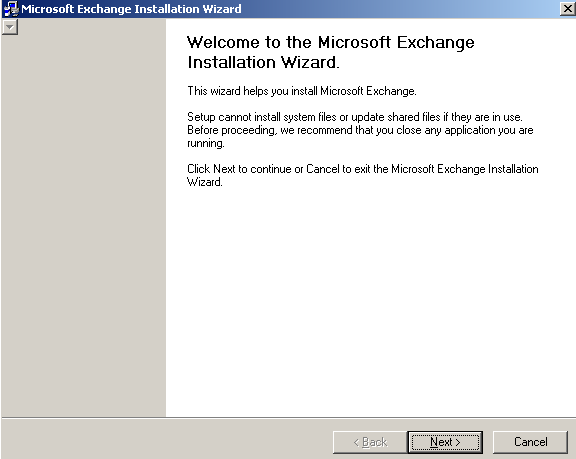
Hit Next. Set all components to Remove.
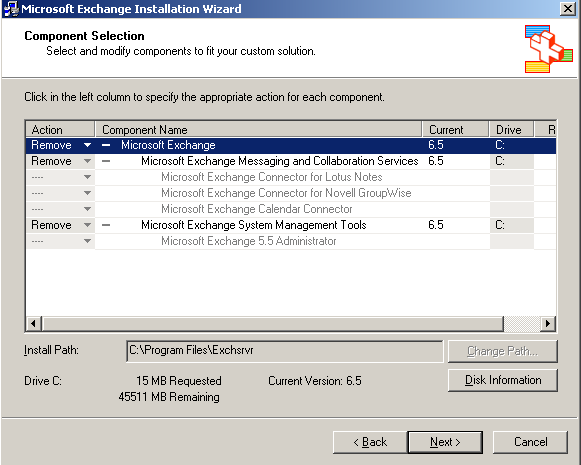
Hit Next, then Next again.
The uninstallation should look like this:
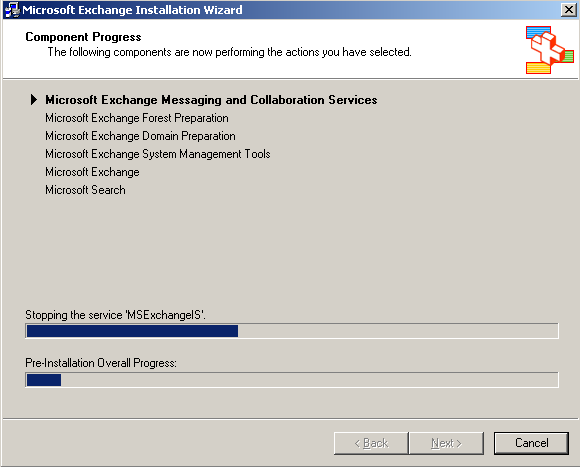
Finished!
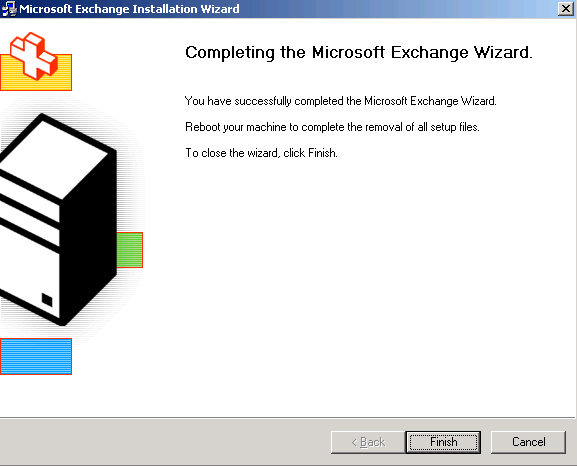
From here, I would change around some things — such as installing antivirus on Exchange 2010, and getting 2010 backed up.
Hope this guide was helpful for your own Exchange 2003 to 2010 migration!