
Dynamic DNS (DDNS) Slave CentOS 6
Dynamic DNS (DDNS) Slave CentOS 6
This blog assumes you went through the previous blog on how to setup a Dynamic DNS Master server, if not click the below link
http://blog.zwiegnet.com/linux-server/configure-dynamic-dnsddns-centos/
The Dynamic DNS Slave server immediately syncs the updates from the master, sometimes it’s just nice to have a secondary DNS server in the event of a failure, redundancy, or if you run your environment ONLY on slaves, then this is ideal.
Login, and su to root

install the necessary bind packages
start bind after a reboot, as well as now

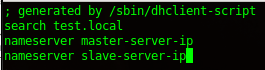
edit your resolv.conf to have the search domain, as well as the proper primary and 2nd servers
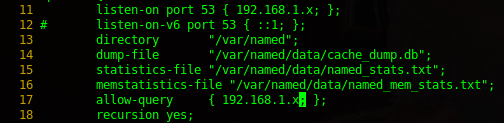
edit the named.conf, match lines 11,12,17,18 to your master server
restart bind to make sure your changes worked properly

from here we need to add our slave zones to our named.conf
add lines 45 to 55, make sure it’s consistent with your master server

restart bind once completed
you should see something like “transfer of zone xyz from master server in /var/log/messages

let’s view the zone to be sure
view /var/named/slaves/test.local
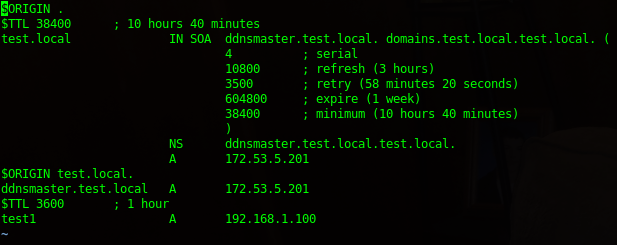
as you can see, it’s an exact copy of the DNS zone.
Let’s test an update form the master, just to be sure


let’s check the slave logs
you should see transfer started/completed in the slave logs
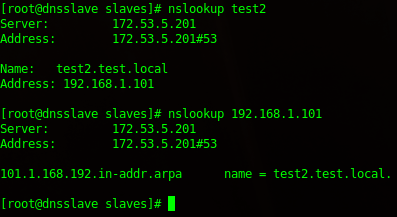
great it works!
That’s it! You have successfully configured a Dynamic DNS Slave server.
Hosted Linux Servers at www.zwiegnet.com/go