
Add Samba Schema to 389 Directory Server LDAP CentOS 6
Add Samba Schema to 389 Directory Server LDAP CentOS 6
After you have setup 389 directory server, you more than likely will want to have your LDAP/Samba passwords sync, or be able to be changed in the same place, that’s where this blog comes in. In this example we have a LDAP domain on one server, and a fileserver that currently serves NFS, but we want to add Samba functionality.
Setup Samba LDAP Schema:
Let’s get started, login to your LDAP server and su to root
change to /etc/dirsrv/slapd-{instance}/schema

once there, create a new file called 61samba.ldif (the 61 is important, because it specifies priority)
download the schma to this directory

In case the above link is broken, click here
set permissions to match the rest of the schemas

once setup correctly, you need to restart the dirsrv service
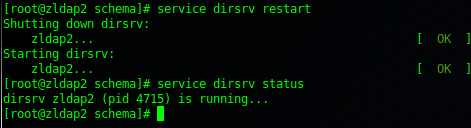
now let’s verify that the schema has been properly loaded:

you should see a bunch of lines like the following, reporting on the fact that the schema is loaded

Configure Samba Server to use LDAP Schema:
First things first, we need to install the EPEL Repo, this is required to the smbldap-tools package(s)


In this case, we have not yet installed samba on our NFS server, so we are going to install samba via yum

we also need to install the samba-ldap dependencies (at this point we have already joined our server to our LDAP domain, you should if you have not yet)

set the samba service to start on startup, and start now

from here we are going to make a backup of the default samba config, and then clear the current config to start fresh
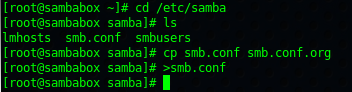
copy/paste the following:
[global]
workgroup = MSHOME
security = user
passdb backend = ldapsam:ldap://ldapserver.domain.local
ldap admin dn = cn=Directory Manager
ldap suffix = dc=domain,dc=local
ldap user suffix = ou=People
ldap machine suffix = ou=Computers
ldap group suffix = ou=Groups
log file = /var/log/%m.log
socket options = TCP_NODELAY SO_RCVBUF=8192 SO_SNDBUF=8192
os level = 33
domain logons = yes
domain master = yes
local master = yes
preferred master = yes
wins support = yes
#logon home = \%L%uprofiles
logon path = \%L[rpfo;es%U
logon drive = H:
template shell = /bin/false
winbind use default domain = no
# Password sync settings
unix password sync = yes
ldap password sync = yes
pam password change = yes
# SSL Settings
# Un-comment the line that applies to your LDAP environment
#ldap ssl = off
#ldap ssl = start tls
This is for your basic LDAP authentication, we also need to setup shares, add the following, and customize as you go, but start with one. Here is an example:
# —————————- Share Definitions ———————– #
[Music]
path = /Music
valid users = +Music
writable = yes
public = yes
once added to the config, and you are sure it’s all right, save + quit, we need to test our samba configuration
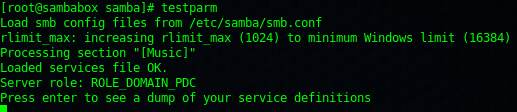
as you can see, there are no outstanding errors, nothing saying things like “invalid parameter” or anything like that
restart the smb service

as you recall from earlier, we setup the “Directory Manager” as the account that’s going to be authenticating with LDAP, however we did not give it a password, therefore at this point it’s not yet working.
To set a password for the Directory Server account to talk with samba, issue the following command:
smbpasswd -w {directorymanagerpassword}

** IF YOU HAVE A PASSWORD WITH SPECIAL CHARACTERS, YOU HAVE TO USE BACKSLASH IN FRONT OF EACH CHARACTER **
Ex: H@ppyC@t
it should add it to the local passwords, and tell you it was stored….

restart samba once more….

you will need to manually create your samba accounts the first time, example:
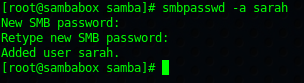
at this point, you should be able to login to your share via your LDAP/Samba Credentials
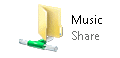
Success!
Password Changes:
To update your LDAP Password and your Samba password, log into any NAS, and issue the following:
sudo smbpasswd -a {username}
This will update your samba and LDAP password at the same time.
That’s it!
Hosted Linux Servers at www.zwiegnet.com/go