
Export VM command line XenServer 6
Export VM command line XenServer 6
This tutorial walks you through how to export a VM via command line in XenServer6, this is helpful if you need to make a backup of a VM, or move to another pool. Let’s get started!
login, and su to root

from here we need to make a location to mount a NFS Share

mount the NFS share where you will export the VM to

from here issue the vm-list command

in this example, we are exporting the VM named “DNS3”

from the XenServer console, you should notice that the status has changed to “busy” or yellow
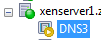
This will take some time, and it’s relative to your Storage, and Network. Usually the smaller the VMs, the better in this case.
you should see the following once completed:

You have successfully Exported your VM to .xva format.
You can additionally use this Script:
#!/bin/sh
# Created By Andrew Zwieg 2/23/2014
# Version 2.1
# Prompt for Server Name
echo Enter Server Name as it appears in XenServer, and hit Enter
read SERVERNAME
# export the VM to file
echo Enter the Location to Export VM to “ex: /mnt/Xen”
read MOUNT
# Export the VM to File
xe vm-export vm=$SERVERNAME filename=$MOUNT/$SERVERNAME.xva
That’s it!
Hosted Linux Servers at www.zwiegnet.com/go
Related guides: Mount NFS Share on CentOS 6