
MySQL Replication CentOS All Databases
MySQL Replication CentOS All Databases
** THIS BLOG WORKS ONLY WITH MySQL VERSION 5.1 or EARLIER **
If you’re going to do it, do it right. Usually blogs have you do this for only 1 Database, that’s pretty much worthless, we’re going to do it right using the traditional Master/Slave Setup. This article assumes you have two Boxes with MySQL already installed, started, just not yet configured. Here’s what we have:
Standard Setup, Port 3306, same MySQL Version 5.1.69
MASTER = 192.168.1.241
SLAVE = 192.168.1.242
Let’s get Started!
Edit the MySQL configuration file on your master (you may want to make a backup)

add these lines below the [mysqld] part somewhere

now restart MySQL

Now we have to create a slave user (service account) in order to process replications, so login to MySQL

you prob. do not want to use the example credentials we have:

now run the next few commands: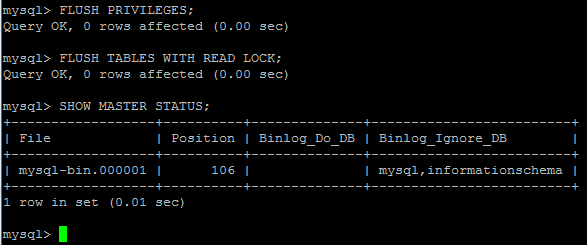
now we need to write our Position Number down (it’s unique every time, this is our example, yours will be different)
exit to a shell, and dump the database info
and Unlock all tables on Master

now copy/sftp the .db to the SLAVE server.
from here, login and edit the MySQL config

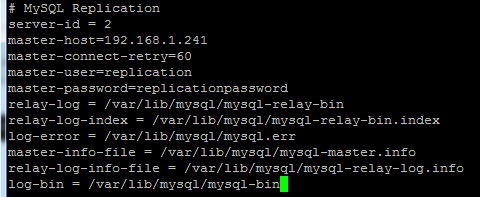
append the following to the config (please edit username/password and host if different)
import your dump (do not yet restart MySQL until after you have imported the DUMP)

modify the slave in MySQL
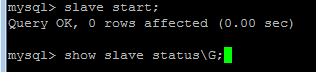
Perfect! It’s working! (if not check your username/password configuration for replication user in MySQL)

Now to show off a bit:
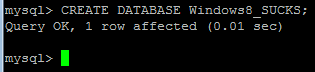
create a database on the Master
now let’s go to the slave:
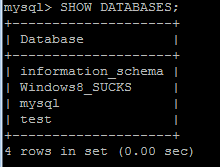
How sweet is that, Seconds Later, the database has been created/replicated to the slave. Beautiful! Just Amazing!
That’s it!
To get a hosted Linux Database Environment visit www.zwiegnet.com/go to get started today!
Related guides: Configure MySQL Multi-Master Replication | Convert MySQL Slave to Master
1 Comment